Pages

Showing posts with label kitchen. Show all posts

Monday, August 19, 2013

Painting the Kitchen Cabinets White

Pin It

To make a long story short, I love white cabinets, plain and simple.  Sadly, our builder did not offer them so I chose espresso,  hoping they would grow on me.  They didn't.  :( 

After 6 months of living in this house and wondering why my non-stop decorating was not giving it the feeling of home...I looked at the pictures of our old house...trying to determine what it was about that house that made me feel so happy to be there, despite it's too small size.  I decided a big part of it was the kitchen, I loved the bright kitchen.

After I made the choice to go white we priced out new doors.  After hearing that number, we decided painting them was good enough for us.

Then the waiting began...I had made my choice just in time for my husband's busy season of work to start.   Funnily enough, he is a professional painter and the summer time is the busiest of the year.  Luckily for me, he had last week off and he offered to paint my cabinets!

As I said, he is a professional painter...I didn't ask him how he was going to do it and I didn't hover or offer to help.  I stayed up in my sewing room furiously working on orders with baited breath!

Here is the final result!!  Oh, of course there are still a few touch-ups needed here and there and we would like to add tile (gray subway, anyone?!) and some sort of board and batten treatment to the island...but for now, I am elated!  And guess what?  It feels more like home, which makes the choice all worth it for me, even if other people think I have lost my marbles for painting practically brand new cabinets.  LOL :)  :)
Tomorrow I will post the sources of our new knobs and pulls...I will also do my best to post how my hubby painted the cabinets and what products he used. 


Thursday, February 28, 2013

Pantry Remodel ~ In Progress

Pin It


One of the most disappointing situations we encountered while building our house was realizing that our kitchen was vastly different than the model.  In addition to less cabinets and counter tops, our kitchen would not have room for an overhang like was shown in the model home.

Honestly, had we not been "homeless" and living with my parents...I might have walked away from this house.  I know it's silly, but I was down for days after I found out.  I always had this dream of my kids sitting at the island and cooking with me in the kitchen.

After living in our house for awhile, we realized that we could remove the existing pantry and replace it with a wall of pantry cabinets.  This not only gained us 12 inches of space in the kitchen...it actually gives me more functional storage!  Everything from our old pantry is in the new pantry and I still have plenty of room to expand.  (and nope, I am not going to paint or stencil the back of my pantry...I am not going to take out all the food and put it in "pretty" containers.  It's a pantry, people!)


Work is still obviously in progress.  Hubby is now tackling the tedious job of trying to patch in the floor pieces, putting molding around the cabinet, and replacing trim on the floor.  Then of course he will have to repaint the walls.

From these pictures you can also get a sneak peek of our Ballard Designs outlet lighting fixtures!  For now we are going to live with no overhang while we decide what, if anything, we would like to do about replacing the top on the island with a bigger one.


The light fixtures and pantry were selected with the knowledge that we have made the choice to go white with the cabinetry.  It's not just me...Todd likes it better, too.  :)  I know some people love espresso and dark cabinetry...unfortunately our builder did not give us the choice of white.  I chose the espresso hoping it would grow on me and it hasn't.

Also from the pictures you can get an idea of how the extra foot gives the kitchen a more square and open feeling.  The width more matches the length now and makes the space feel better for me.

Before:

 After:

Before:
  After:

I wish that the bulkhead could have been removed, but that would have involved moving wiring and trying to match the ceiling texture for the repair.  So I am letting it go.  In person, it doesn't feel that noticeable.


Saturday, February 2, 2013

Ballard Designs Outlet

Pin It
 
Many years ago I went to a Ballard Designs outlet store in Ohio with my friends.  I don't even remember anything about it besides walking in and out in about 5 minutes and not buying anything...obviously, I never really thought about it again.  Even though, I continued to drool over the Ballard catalog when it would come the my house!

Fast forward to now, I have been coveting one of their orb chandeliers for over my kitchen table and I mentioned this to a friend who lives in Atlanta.  She offered to run to her outlet store and check for me....whaaat?!!  A quick Google search revealed that the old outlet store I visited in Ohio had been closed, BUT there is a new store on the other side of town.  Right on the same exit as Ikea...which I have been to a dozen times in the past year!  GAAAAH!!!

So yesterday, while the kids were in school, hubby and I took a little drive (1.5 hours each way) to see if the new store was any better.  As you can see from the pictures, it IS better! I so wish I had known this store was here 6 months ago when we were buying so much furniture for the new house.  The prices were not dirt cheap, grab as much as you can carry and run out fast before anyone stops you low, but they were very affordable!  For around $100 more I could have gotten a better quality desk, coffee table, etc...than Ikea.  


Most items were 20%-40% off the catalog price and each week they run doorbuster sales and those items were a great deal!

A couple of the items this week were this lamp for $39.99.  


These small garden district mirrors were $79.99 for a set!


Even though I almost left with a rug, coffee table, mirrors, and new lampshades...our goal yesterday was lighting!  So I put all the other stuff down and focused on the mission at hand.


We ended up with the orb chandelier I had been wanting.  The catalog price was $299 (on sale!) plus $50 shipping.  I got it for $210.


We didn't go there planning on buying anything else but the chandelier...however, if you recall I have also been on the lookout for pendant lights.  We came home with two of these small Eldridge lantern lights for over the island. Retail price $149, plus shipping.  We got them for $77 each.


Finally, on total impulse, we picked up one of these Dianna pendant lights to hang at semi-flush height over the kitchen sink.  Retail price $149, plus shipping.  We got it for $77. 


Overall, it was a very successful day and I am thrilled with our purchases!  I can't wait to go back when I have more time to look at everything more slowly. I will also be keeping an eye on those weekly door busters, which they post online.  The Ballard Designs outlet was also connected FrontGate and Grandin Road outlet stores.  If you are anywhere close to West Chester, Ohio...check it out!

Thursday, January 17, 2013

Lighting Issues

Pin It
This is definitely a first world problem...but I am having lighting stress!

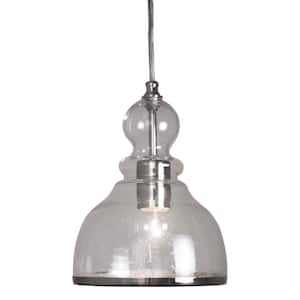
The other day, my hubby took me to Home Depot.  He knows me all to well, for when I could not decide on which pendants I liked he bought one of each for us to take home and hold up.  Sigh...that's love.


While I like aspects of each light, I felt like none of them were exactly what I was really wanting.

Back to Home Depot to return the lights.

The online search began and I found what I was looking for on Amazon for $144.  More than I was wanting to spend.  However, for $96, there were two used, but like new, from Amazon Warehouse deals. No tax, free two day shipping...SOLD!  They came in ONE day!


However, when Todd went to install them today the socket on one was crooked and no amount of adjusting could fix the problem.  :(  So back in the mail they go and I am still at square one.

My sisters have affectionately dubbed me, Bessie, after my Grandma.  She was known to buy and return things many times before she settled on her choice!

  Honestly, I am getting a little frustrated with myself.  Lately, I can't make a decorating choice until I have exhausted every single option.  On the same hand, when you are spending your hard earned money on something you will have to look at every day for years...there's some pressure! lol  I am definitely a visual person and need to see everything together in the room, I am just glad my husband understands.  And it's ok, you can laugh at me...I have been laughing at myself a lot!

I won't even tell you about my couch issues today...

What about you, can you make decisions easily?  Can you visualize what something will look like in your home before you purchase?

Tuesday, August 21, 2012

DIY Dry Erase Menu

Pin It
 
My best friend. over at room*6, has a lot of practical organization tips.  Unfortunately, organizing solutions just do not come natural to me and I copy her ideas whenever I can!

  One tip is her method for menu planning.  Instead of planning what she will cook each specific day in advance, she makes a more flexible menu plan of 10-12 dinners than she can cook anytime over the two weeks between grocery trips.  She leaves her menu on the counter so it is easy to see for both herself and the family.  After each dinner item is prepared, she simply crosses it off her list.


On my last trip to the grocery store I lost my list and my menu I had written for myself.  I decided it was a good time to put her tips into practice for my own home.  Plus, I had a large empty wall between the cabinets and the back door that happens to be very visible when you enter from the front door.

AHA!  It was the perfect place for a functional and beautiful menu.

After perusing some ideas on Pinterest, including many chalkboard menus...I decided to use an Ikea Ung Drill frame as a dry erase menu board.  The frame is large enough to fill the wall and I like the ornate look.  It cost $29.99.


I spray painted the frame white and added ticking stripe that I fell in love with at Hobby Lobby...done and ready for menu planning!

A white ceramic creamer and sugar set place on the counter holds my dry erase markers and extra chalk for the canisters.


Check out one of my favorite blogs, akadesign, for many more DIY ideas!

Tuesday, July 31, 2012

Got Groceries?

Pin It
Who doesn't right?

The other day I made this quirky sign for over my pantry.  Bad blogger that I am, there are no step by step pictures to share.  However, it was a pretty straightforward project.


I purchased a picture frame in the size I wanted for $19.99 at Garden Ridge, then discarded the mat and cardboard.
  I also purchased paper letter stencils, glass paint, and a foam brush.  I taped the letters to the glass and painted my "groceries" word.

  I didn't worry too much about the paint bleeding because I was able to wipe the excess off and in addition, I wanted the sign to have a whimsical, imperfect feel.  Good thing, too!!  Because...if you are paying close attention...you will notice that the "S" is upside down.  Oopsie!


Tuesday, July 10, 2012

White Ceramic Owl

Pin It
I went shopping with my sister last night and I spotted this cute guy (or girl, I guess) at TJ Maxx.  Do you ever spot something that you know you just have to have...you try to talk yourself out of it...but you keep circling back to it in the store?   That was me!

 Actually, I couldn't think of a reason to buy it, until it dawned on me!  Cooking utensils!  That was all I needed, I grabbed him and brought him home.


Tuesday, June 26, 2012

Moving is a lot of work!

Pin It
I know I have disappeared the last few weeks.  Unpacking has been my main focus!  After feeling like my family has been uprooted in one form or another for the last 6 months I have been on a mission to get us feeling settled.

I don't have many house pictures yet as we are still painting and all that fun stuff.  However, I thought I would show a few pictures from the day we moved in.  Because our closing was on Monday morning, but the house was finished on Friday, we were able to sneak in over the weekend and start some painting.  (Don't worry, the building supervisor gave his ok)  As always, I can't believe what a difference paint makes!

The kitchen before:
 The family room before:
 The entryway before:
 The kitchen after:
The paint color is the same Sherwin Williams Upward blue we had in the old house.
(notice the "happy closing day" cupcakes we got for ourselves.....err...the kids.)

 The entry way after:
I chose Sherwin Williams Repose Gray for this area

(That little wall beside the stairs has since had stripes added, I will post more on that later!)

Here is the outside the day we moved in...of course, the garage is now FULL of stuff still to be unpacked now.  Mostly home decor that I need to decide where to put on the walls.

My favorite thing about our new house is the lot.  We live on a street that dead ends at a farmer's field.  There are 6 houses on the street and 8 kids to play together.  My kids have had a blast being able to go outside and play! I have peace of mind knowing that the pretty much no cars are going to come down the street and the ones that do are the parents of some of the kids playing. 

So in other news, Evie learned to ride her bike last week and yesterday we dropped McKinley at church camp for the week.  So far, it's been a great summer!


Related Posts Plugin for WordPress, Blogger...